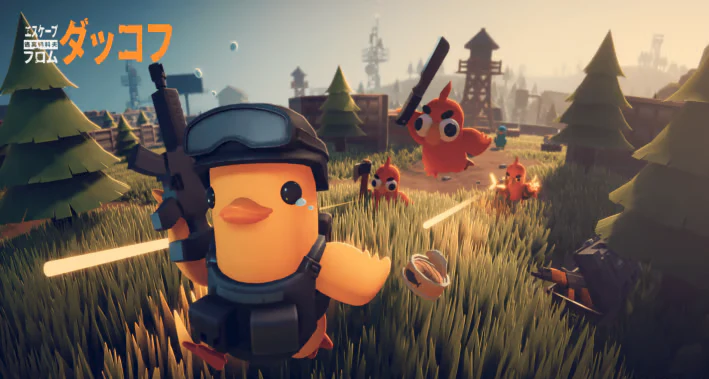
Overview
Duckov features a type of equipment called Totems. These accessories boost stats that aid in combat and exploration, making them a crucial element. This article will explain the evaluation and uses of all Totems.
Note to Readers
This article has been machine-translated from the original Japanese. For the most accurate content, please refer to the Japanese Original version.
What is a totem?
- Total of 23 types
- Each has 1 to 3 levels
- Do not lose upon death
- Cannot equip same type/same level
There are 23 types of totems in total. Each has levels 1 through 3, with slightly different effects. At the maximum level 3, some totems also have negative effects. Some totems, like Tactical Reload, do not have levels.
Totems remain equipped even after death and are not lost. This applies only to currently equipped totems; those in your inventory are lost. You can equip two totems, but you cannot equip two identical ones. However, you can equip totems of different levels, such as Space Resistance 1 and Space Resistance 3.
How to Obtain Totems
- Exchange in the Bunker Basement
- Exploration
- Enemy Drops
- Dropped by specific named mercenaries
Totems can be exchanged for “Blurred Feathers” in the Bunker Underground. The exchange method is summarized in a separate article, so if you’re unfamiliar, please refer to that. While totems can also be obtained through exploration or enemy drops, they generally don’t drop very often, so the main method of acquisition is through exchange in the Bunker Underground.
There are also named mercenaries, like the “Facility Director” north of the Mining Facility in Farm Town, who drop totems reliably.
Totem Quick Reference Chart
| Name | Effect (※ indicates a Level 3 negative effect) |
|---|---|
| Headshot | ヘHeadshot Damage UP ※Gun Spread Rate UP |
| Perception | Detection Range UP |
| Recovery | 1Recover HP for 10 seconds without taking damage ※Increased energy and water consumption |
| Hunger resistance | Energy DOWN Water consumption DOWN |
| armor | Head Armour UP Body Armour UP ※Fire, Poison, Electric, and Space Resistance DOWN |
| robust | Increased storage capacity Increased maximum weight |
| Advance | Gun Damage UP ※Gun Range Coefficient DOWN |
| Sniper | Range Coefficient UP Field of View UP Mobility DOWN |
| Electrical resistance | 1: Electrical Damage DOWN 2: Electrocution nullified 3: Both effects |
| Toxic resistance | 1: Poison Damage Reduction 2: Poison Immunity 3: Both Effects |
| Fire Resistance | 1: Fire Damage Reduction 2: Immunity to Burning 3: Both Effects |
| Spatial tolerance | 1: Reduced damage taken in the affected area 2: Shatter immunity 3: Both effects |
| Physical Toughness | 1: Physical Damage DOWN 2: Bleeding Immunity 3: Both Effects |
| Fire Control | Recoil control UP Gun dispersion rate DOWN |
| Berserk | Close-range Critical Hit Rate UP |
| marathon | Stamina consumption DOWN |
| Stamina | Maximum Stamina Boost Stamina Recovery Boost |
| swift-footed | Walking speed increased Dash speed increased ※ Takes damage at regular intervals |
| Ninja | Running sound range DOWN Walking sound DOWN |
| HP | Stamina UP ※Agility DOWN |
| efficiency | Enhanced Meal Effect Enhanced Recovery Effect |
| Warrior | Melee Damage UP ※Melee Critical DOWN |
| Tactical reload | Reload speed increase |
Totems that excel in specific situations
- Electric Resistance
- Poison Resistance
- Fire Resistance
- Space Resistance
- HP
First, these are totems that shine in specific situations. While not for everyday use, they prove invaluable when tackling certain bosses. Particularly in the final map, the “Storm Area,” bosses appear that specialize in specific attributes. Having these resistance totems makes combat significantly easier compared to not having them. Each attribute also includes effects that inflict slip damage (like Bleed, a debuff that deals damage every few seconds) such as Electrocution, Poison, Burning, and Crush. Totems that can nullify these are exceptionally valuable.
While these totems are primarily useful in limited situations, you should aim to have at least one. For the strongest attribute, Space Resistance, some enemies require equipping both Level 1 and Level 3 totems. If you have few totems, you can boost durability by combining Electric Resistance with HP totems, for example.
A totem that shines in everyday use
- Recovery: Recovers HP after avoiding damage for a set duration
- Armor: Increases Defense
- Toughness: Increases Backpack Capacity and Weight Limit
- Assault: Increases Gun Damage
- Swiftness (Lightweight): Increases Movement Speed
- Physical Resistance: Increases Physical Resistance and negates Bleeding
Recommended: Swift and Tough Totem
This totem excels in everyday use. My personal recommendations are “Toughness” and “Swiftness,” which boost exploration and gold-making efficiency respectively. If you’re just hunting familiar named mercenaries or exploring, these two totems should suffice.
Recovery Totem
The Recovery Totem gradually restores HP over time if you don’t take damage for a certain period. This totem significantly helps conserve medical supplies, and if you can equip three totems, it’s one you’ll want to equip. The peace of mind knowing you can recover even if you run out of medical supplies during combat is substantial. If you’re exploring an area for the first time or one you’re unfamiliar with, this totem could be quite useful.
Armor Totem
The Armor Totem boosts your head and body armor. This reduces damage from gunfire, proving invaluable when tackling unfamiliar areas, named mercenaries, or boss fights.
Advancing Totem
It increases gunshot damage. This totem is also useful when exploring unfamiliar areas or defeating named mercenaries for the first time. Level 3 has the drawback of reduced range, but generally, Level 3 should be fine if you’re going to equip it.
Physical Resistance Totem
The Physical Resistance Totem’s “Bleeding Immunity” effect is extremely useful. Bleeding is a debuff inflicted by all enemies, making this totem invaluable when exploring unfamiliar areas. Since curing bleeding requires Hemostatic Bandages or Medicines, it also helps conserve your medical supplies.
uses
- Exploring Familiar Areas
- Toughness · Speed
- Exploring New Areas
- Physical Resistance · Recovery
- Named Mercenary Strategies
- Advance · Armor
If you were to switch them out, it would be something like this. Totems can be swapped during exploration. If you have multiple copies of a totem, you can bring extras and swap them out depending on the situation.
Personally, I find the “Toughness” totem extremely useful during exploration and rely on it heavily. My strategy is to start with “Swiftness” and “Healing,” then switch to “Swiftness” and “Toughness” for the return trip.
Totems that excel in specific situations
- Berserker
- Warrior
- Marathon
- Ninja
- Perception
Berserk Warrior Totem
These are totems related to melee attacks, and I believe they are most useful for players who restrict themselves to melee combat, such as those playing with a “melee-only” setup. While melee weapons do indeed have high stats like armor penetration and are powerful, they increase the likelihood of taking damage, making this playstyle not recommended for the average player.
Marathon Totem
The Marathon Totem excels in specific situations where stamina consumption is reduced, allowing you to keep fighting while retreating. I used it for the first time to defeat the Halloween event ghosts. If similar enemies appear in the future, it might prove useful again.
It’s also an excellent tool for boosting efficiency in Duckov’s highly effective gold-farming method, the “XO Room Loop.”
Ninja Totem
The Ninja Totem reduces the chance of being spotted by enemies. Players who prefer to explore unfamiliar areas without being detected likely use it. It’s also recommended for inexperienced players who tend to panic when surrounded by multiple enemies.
Like the Marathon Totem, it’s an excellent item that boosts gold-farming efficiency in Duckov’s highly effective method, the “XO Room Loop.”
Sensing Totem
The Perception Totem is similar to the Ninja, and when combined with headphones, it makes it easier to locate enemies behind walls. It’s recommended for players who prefer a playstyle focused on exploration without encountering enemies.
Other
Personally, I rate the following totems rather low.
Sniper Totem
The Sniper Totem is recommended for players who enjoy sniping. It increases your field of view and range, making it easier to snipe with a sniper rifle. The downside is that the Sniper Totem has the negative effect of slowing your movement speed.
Shooting Control Totem
This totem reduces recoil and minimizes gun spread. While its effect is strong, you can only equip two totems at a time, so opportunities to use it may be limited.
Tactical Reload
It’s effective when using weapons with slow reload times, like LMGs or snipers. It should also shine in situations where you have to fight enemies that require multiple reloads. Personally, I don’t rate it highly since such situations aren’t common right now.