- Overview
- Note to Readers
- Exploration Methods
- Exploration Points
- Progress through the quest
- Way home
- About the Weather and Time
- What is a spatial storm?
- What to bring back
- What to sell
- Regarding Weight Restrictions
- About Support Dogs
- About Each Piece of Equipment
- About Melee Weapons
- Items required for the quest
- About Death Penalty
- Equipment to bring when picking up lost items
- Regarding Equipment Durability
- About Headshots
Overview
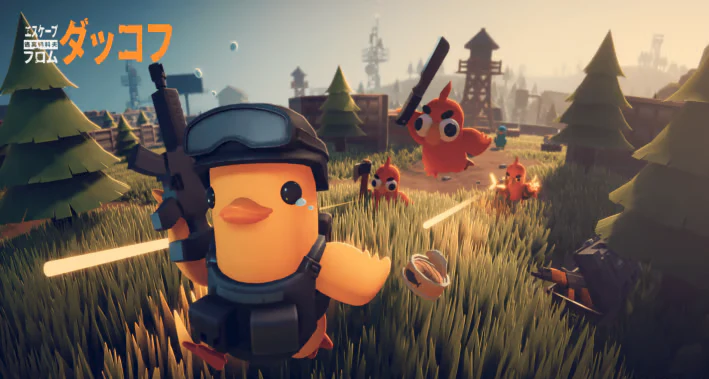
Here’s some useful info for new players starting Duckov. This game involves exploring maps while collecting items, completing quests, and defeating bosses.
I’ll try to avoid spoilers in my explanations. I hope you’ll find this helpful even if you’re concerned about spoilers.
Note to Readers
This article has been machine-translated from the original Japanese. For the most accurate content, please refer to the Japanese Original version.
Exploration Methods
First, let’s head out from the base. Enemies lurk outside the base, so grab a handgun from the “Supply Crate.” Be mindful of the warnings in the upper-left corner of the screen, as certain times and periods can be dangerous.
Exploration Points
- Console > Machinery
- Clothing > Keys
- Med Kit > Medicines and Food
- Ammunition Box > Ammunition
- Safe > Items for Sale
- Loot > Weapons and Armor
- Food Box > Food and Water
- Miscellaneous Box > Miscellaneous Items and Machine Parts
- Tactical Box > Equipment, Bullets, etc.
- Toolbox > Tools and Parts, etc.
- Hidden Spot > Worms, etc.
- Tactical Supply Box > Ammo, Customizations, Weapons, etc.
- Box > Food, Healing Items, Parts, etc.
- Toilet > Poop
The map features various exploration points. Each has a certain tendency for what items are likely to appear. You can probably guess what they contain based on the appearance of the exploration points themselves.
Progress through the quest
First, let’s progress through the quests. Completing quests unlocks numerous elements, so rather than wandering aimlessly around the map, I recommend focusing your adventures on quest objectives.
Way home
- Bunker Entrance
- Boat Landing
- Escape Point (Green Mark)
To return home, you must either go back to the bunker (player base) or head to an escape point marked with a green marker on the map.
Once the game progresses past the midpoint, you’ll be on a map far from the bunker, so escaping anywhere other than an “escape point” is impossible. As nightfall brings dangerous conditions, planning your exploration route with time in mind will make things smoother.
You can reach certain maps by boat. As long as you have a ticket, you can use that boat to return to the bunker.
About the Weather and Time
The top left of the screen displays the current time and weather.
The time indicates the hour, and as it gets dark, visibility decreases, making exploration dangerous. The game will alert you to hazardous times.
Weather also impacts gameplay. Some monsters only appear during specific weather conditions.
What is a spatial storm?
Below the time, it reads “XXX:XX until the next spatial storm.” Spatial storms appear to be abnormal weather events that occur on this planet for a set period. These events have two stages, with the conditions described in the same location.
Since it’s abnormal weather, going outside isn’t recommended, and the game properly warns you. However, where there’s risk, there’s also reward, so the time may come when you venture into the storm.
What to bring back
- Weapons
- Armor
- Equipment and Customization
- Sellable Items
- Materials
- Food
Exploring allows you to find many items. Your bag fills up quickly, so you’ll likely struggle with what to bring back. Early on, you’ll want weapons, armor, and bags.
Each item has a set price, so you can sell them at vending machines or to merchants to check their value. Remember the high-value items and prioritize bringing them back next time. Conversely, you probably don’t need to pick up the cheap items.
What to sell
Items you bring back can be sold. Generally, it’s fine to sell common items. You can also sell any extra equipment or weapons you have.
Since some items, materials, weapons, and armor are required for quests, it’s recommended to keep about 2-3 of each.
Items you should try to keep are listed in a separate article.

Regarding Weight Restrictions
Picking up too many items will cause you to exceed your weight limit. Your movement speed will decrease once you exceed a certain weight, and carrying more items will eventually prevent you from walking altogether. If you encounter enemies while unable to move, you won’t be able to escape and will find yourself in a dangerous situation.
Hovering your cursor over an item will display its weight (kg). For heavy items, you can either abandon them or move them to the “Support Dog Inventory” located to the right of your player inventory. The Support Dog Inventory has limited slots but is a valuable space that ignores weight restrictions.
About Support Dogs
Support dogs are companions that follow players around. Items placed in a support dog’s inventory don’t count toward the player’s weight limit, making them useful for carrying heavy items.
Additionally, they’ll bring items back to your base even if you die, so they’re also helpful for storing things you absolutely don’t want to lose.
About Each Piece of Equipment
- Firearm 1
- Firearm 2
- Melee Weapon
- Head
- Body
- Face
- Headphones
- Back
- Totem 1
- Totem 2
There are ten equipment slots as listed above. Generally, equipping all of them provides an advantage. One thing to be mindful of is that these items also have weight. Carrying heavy equipment can sometimes hinder your ability to bring back many items.
On the other hand, heavy equipment often includes powerful items and tends to fetch higher sale prices. Keep this in mind as a reference. Conversely, some lightweight items also command high sale prices, so be aware.
About Melee Weapons
Melee weapons, as the name suggests, allow you to attack by striking. However, striking requires getting close to enemies, making it quite difficult and increasing the risk of death. Conversely, they also serve as a last resort for combat when you’ve exhausted all your ammunition.
Considering this, choosing not to equip a melee weapon is a valid strategy. Melee weapons have weight, so if you have sufficient ammunition, you can leave it unequipped and use the slot for additional items during exploration (you can stow melee weapons found during exploration).
Items required for the quest
The “Required Items” section in the quest log sometimes lists items needed to progress the quest. Therefore, be sure to check beforehand when undertaking a quest. It’s common to find yourself in a situation where you’ve arrived at the quest location but can’t proceed because you lack the necessary items.
About Death Penalty
- Difficulty: Extreme
- Other
Death penalties are determined by the game’s difficulty level. On the highest difficulty, Extreme, you lose all items the instant you die.
On other difficulty levels, you get one chance to retrieve them. A tombstone-like marker appears at your death location. Searching it may allow you to pick up the items you had when you died. There is no time limit, so if you die during a dangerous period, advance the time until a safer period.
However, you can only retrieve items from your most recent death. If you die again before collecting the items from the tombstone, you lose all items you possessed before that death.
※ Totems are not dropped upon death and cannot be lost.
Equipment to bring when picking up lost items
- Firearms
- Head
- Body
- Face
- (Headphones)
- First Aid Kit
- Meals as needed
When retrieving lost items, bring at least basic weapons and armor for combat. If you die again, you’ll lose everything, so make sure to bring sturdy armor. You’ll also need a first aid kit, and bringing a small amount of food will give you peace of mind.
When you retrieve lost items, your bag will fill up, so you don’t need to bring unnecessary items. When going to retrieve lost items, your bag is already at the location (the gravestone), so you don’t need to bring one.
Regarding Equipment Durability
- Use a weapon
- Take a hit
- Use low-quality ammunition
Equipment durability decreases with use. Weapons lose durability when firing bullets, and using low-quality rusty bullets reduces it even faster. Check the “Weapon Wear” stat in the bullet’s stats section. Higher-quality bullets minimize weapon wear.
Durability can be repaired as you progress through the story. However, repeated repairs gradually reduce the maximum durability, so equipment cannot be repaired indefinitely.
Additionally, equipment becomes weaker when its durability falls below half. Once below half durability, you should either dismantle or sell the equipment. If you have storage space, you could also keep it for quests requiring specific items.
About Headshots
This game features a headshot mechanic. Bullets travel in the direction of your aim, but the damage dealt significantly increases when you land a headshot compared to other hits.
To land a headshot, align your crosshair (cursor) with the enemy and fire. After firing, the crosshair will float upward due to the gun’s recoil. When using weapons with strong recoil, be mindful of the following shooting technique.
This is an important technique when using weapons capable of sustained fire, such as submachine guns, assault rifles, and battle rifles. Handguns, shotguns, and sniper rifles, which are typically single-shot weapons, are less affected by this.
The strength of recoil is indicated by the weapon’s stats: “Horizontal Recoil” and “Vertical Recoil”.
Tap shooting
This is how to fire bullets one at a time. Tap firing is especially important for guns with strong recoil. The method involves repeatedly pressing and releasing the button to fire bullets (left-click on PC). By pressing and releasing rapidly, you can achieve a firing style close to automatic fire.
Burst fire
This is a method for firing around three bullets. Similar to tap-firing, it involves repeatedly holding down the fire button for about one second before releasing it. With guns that have less recoil, burst-firing results in minimal sight deviation and maintains decent accuracy.