- Overview
- Note to Readers
- Blurred Feathers
- dog tag
- Cold Core Fragment / Red Core Fragment
- Expansion Boxes (Large, Medium, Small)
- Black Market Contact Notebook
- Graphics card
- Early Game Money Farming: Area Zero Grinding
- J-Lab Key
- Mysterious Key Loop (XO Key)
- How to Obtain the Mysterious Key X and the Mysterious Key O
Overview
Here are items you should avoid selling on Dakkoff. This game has a vast array of items, but the storage space is limited, making it tempting to sell things off. However, you’ll often find yourself needing those very items later on.
Below is a list of items you should avoid selling, along with their uses. While we say “avoid selling,” please interpret this as meaning you should avoid selling more than you need.
Note to Readers
This article has been machine-translated from the original Japanese. For the most accurate content, please refer to the Japanese Original version.
Blurred Feathers

How to Obtain
It drops when you defeat an enemy.
uses
- Totem Creation
- Location: Bunker Basement
This item is used to craft totems (a type of equipment). Each totem requires 8 blurred feathers, and its effect and rarity are random. Therefore, you’ll need countless amounts.
Totems offer various effects like “Increase backpack capacity,” “Gun damage UP,” or “Movement speed UP,” and as mentioned earlier, they also have rarity levels. Feathers sell for a decent price, but you can sell unwanted totems after crafting them. So, for now, it’s probably best not to sell them.
Determining the Right Time to Sell
- Desired totem obtained
- All totems obtained
Once you’ve obtained all the totems you want, you may sell them.
List of Powerful Totems
- Toughness (Max Weight & Backpack Capacity UP)
- Agility (Movement Speed UP)
- Perception (Sensing Range UP)
- Armor (Defense UP)
- Assault (Rifle Attack UP)
- Spatial Resistance (Spatial Resistance UP)
- Physical Resistance (Physical Resistance UP & Bleeding Immunity) ※Level 3 only
- Endurance (Stamina Consumption DOWN)
- HP (Health UP)
Here are the powerful totems. Each has its own level. Recommended ones are Toughness, Swiftness, Armor, and Charge. Others also shine in specific situations. Physical Resistance only grants Bleed Immunity at level 3, making it useful in certain scenarios.
While max-level totems offer the strongest effects, some also come with drawbacks. If you dislike these, using level 2 totems is recommended. For example, Charge level 3 has the drawback of reducing your range.
Totem Exchange Location
You can exchange them in the bunker basement. The bunker is the player’s base. Head right before the bunker exit and climb down the ladder to reach the bunker basement.
There’s no difference between exchanging 8 tokens and 80 tokens; exchanging 80 tokens simply means you get 10 draws.
dog tag

How to obtain
You can obtain it when defeating enemies. It may be exclusive to mercenaries.
uses
- 100 sheets for warehouse expansion (increases warehouse capacity by 80)
- Location: Behind the NPC northwest of the Bunker
This item is used for expanding your storage. While its other uses are currently unknown, the “Trash Bin” option in the storage expansion requires 100 of them. Since they aren’t easy to come by, you’ll need to collect them steadily over time.
Determining the Right Time to Sell
- 100 pieces acquired since then
As mentioned earlier, once you’ve completed the “Trash Can” warehouse expansion item, you can sell it off.
Cold Core Fragment / Red Core Fragment

How to Obtain
Enemies drop these when defeated. Strong enemies drop Red Core Fragments.
uses
- Skill Development
- Location: Small room accessible from the northwest of the bunker
This item is used for skill development. Skill development encompasses various activities like boosting player abilities or increasing backpack capacity. Since large quantities are often required, you might accidentally sell too many and end up short.
Compared to items like dog tags, Cold Core Fragments are relatively easy to obtain, so you can safely sell them while keeping a few dozen on hand. However, Red Core Fragments are harder to come by, so if you do sell them, make sure to keep track of how many you’ll likely need in the near future.
Determining the Right Time to Sell
- Facility: Verify skill development
As mentioned earlier, if you know the number of items you’ll need in the near future through “Skill Development,” you can sell them.
Expansion Boxes (Large, Medium, Small)

How to Obtain
You can find them scattered throughout the map.
uses
- Warehouse Expansion
- Location: Behind the NPC northwest of the Bunker
Expansion Boxes, as the name suggests, can be used to expand your storage. While you can’t upgrade them frequently, you can synthesize lower-tier items—like upgrading a Small Expansion Box into a Medium Expansion Box—to upgrade them. Therefore, it’s a good idea to keep some on hand.
Determining the Right Time to Sell
- Facility: Confirm the required quantity for warehouse expansion
If you can determine the required quantity, it’s acceptable to sell some of it.
Trivia
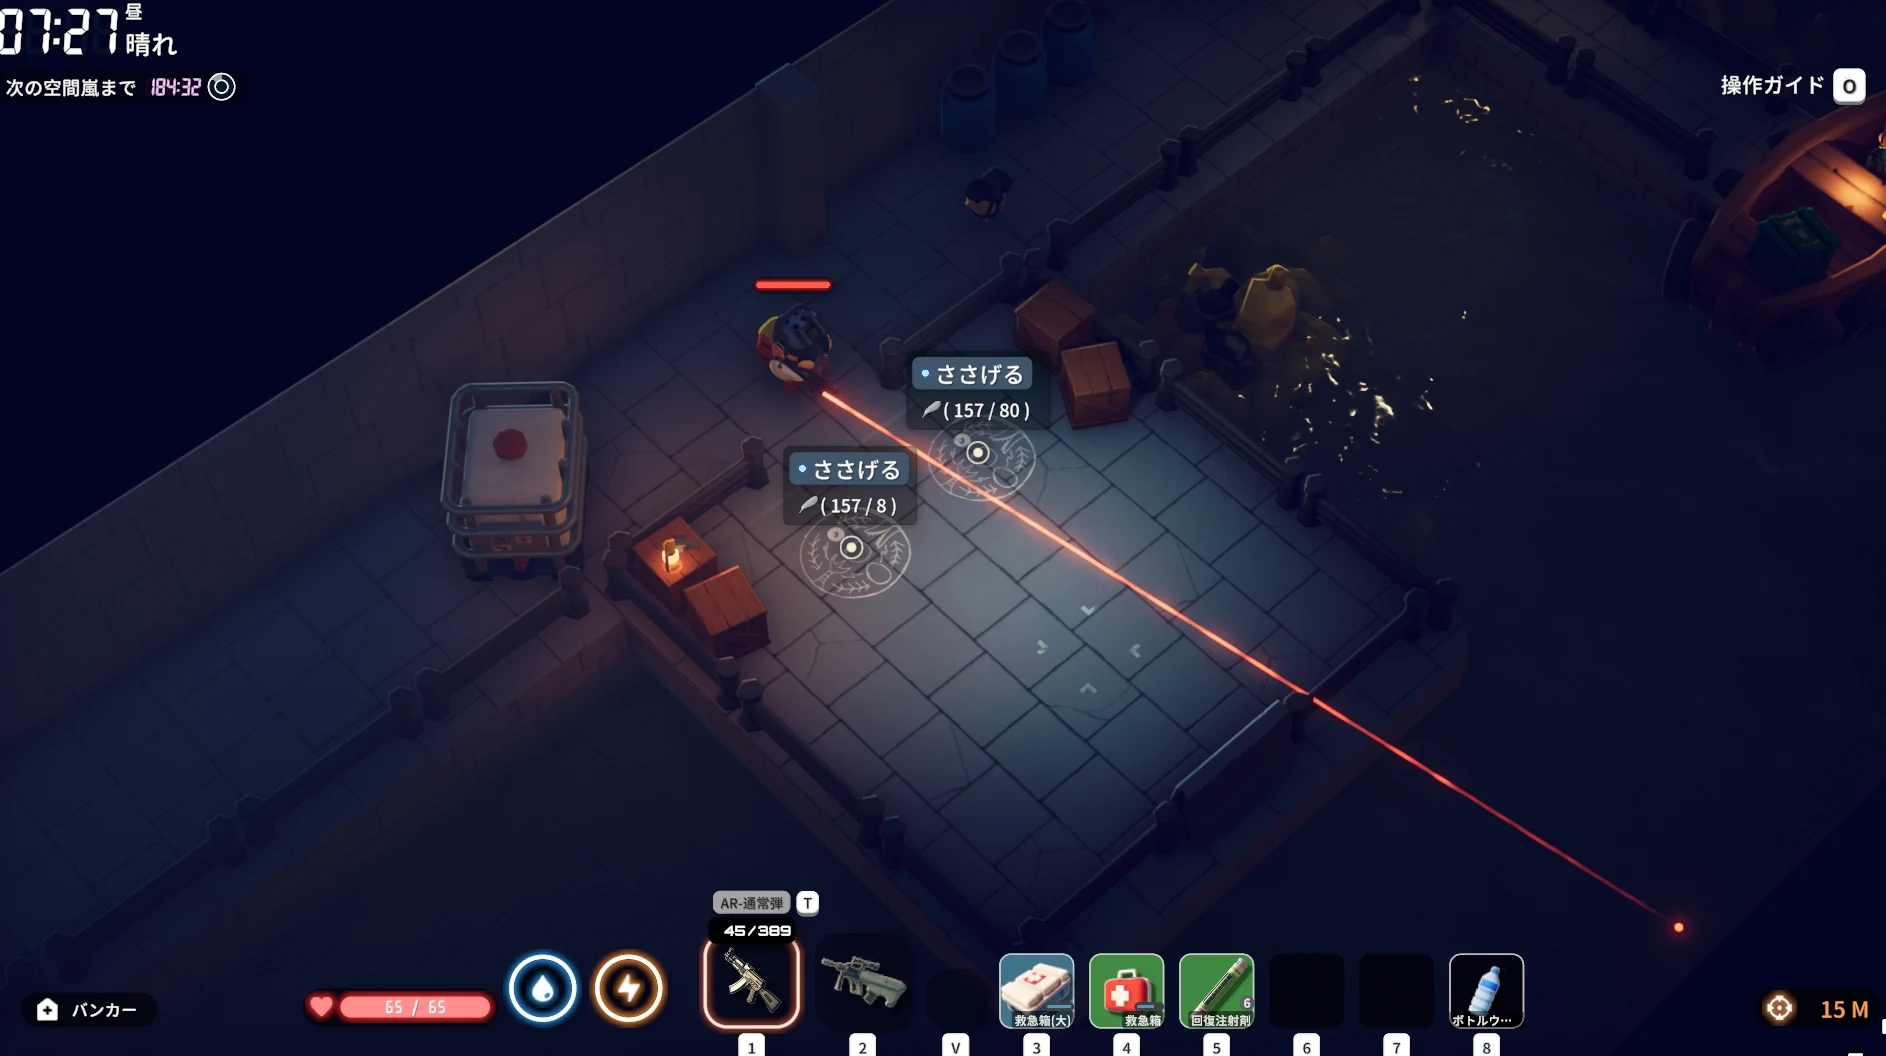
The expansion box is quite heavy at 15.6kg for the small size. Carrying this item easily leads to weight overload, which slows you down and increases the risk of accidents. Place this item in the support dog’s inventory, located to the right of your main inventory.
Items placed in the support dog’s inventory do not count toward your weight limit, allowing you to prevent weight overload before it happens.
※ The support dog’s inventory will be retrieved even if the player dies, so it’s a good idea to swap in valuable firearms or armor when you find them.
Black Market Contact Notebook
How to Obtain
You can find them scattered throughout the map.
uses
- Black Market Upgrade
- Construction: Black Market
You’ll need a large number of these to upgrade the Black Market you can build. While their high price might tempt you to sell them, this item is required in large quantities and is needed for every single upgrade.
The Black Market lets you sell unwanted items for high prices or buy specific items at bargain prices. It proves useful in various situations, like acquiring rare weapons, customization items, or quest items, so be sure to keep the Black Market contact notebook handy.
Determining the Right Time to Sell
- Construction: Verify the black market
On the black market, once you’ve determined the required quantity, you may sell any surplus.
Graphics card

How to Obtain
You can find them scattered throughout the map.
uses
- Bitcoin Mining
- Up to 12 units
- Construction: Bitcoin Miner
Later in the game, you can construct a Bitcoin Miner building. By installing graphics cards into the Bitcoin Miner, it can automatically mine Bitcoin. Over time, it will automatically obtain valuable items.
Bitcoin is an item that sells for high prices, making it effective for earning gold. You can install up to 12 graphics cards into the Bitcoin Miner, and the mining speed increases with the number of cards installed.
Determining the Right Time to Sell
- Once you’ve collected all 12
Once you’ve collected all 12 Bitcoin Miners needed, you can sell them if you wish. Even if you need more later, by the time you finish collecting them all, it will become easier to gather them through XO keys or J-Lab loops.
Early Game Money Farming: Area Zero Grinding
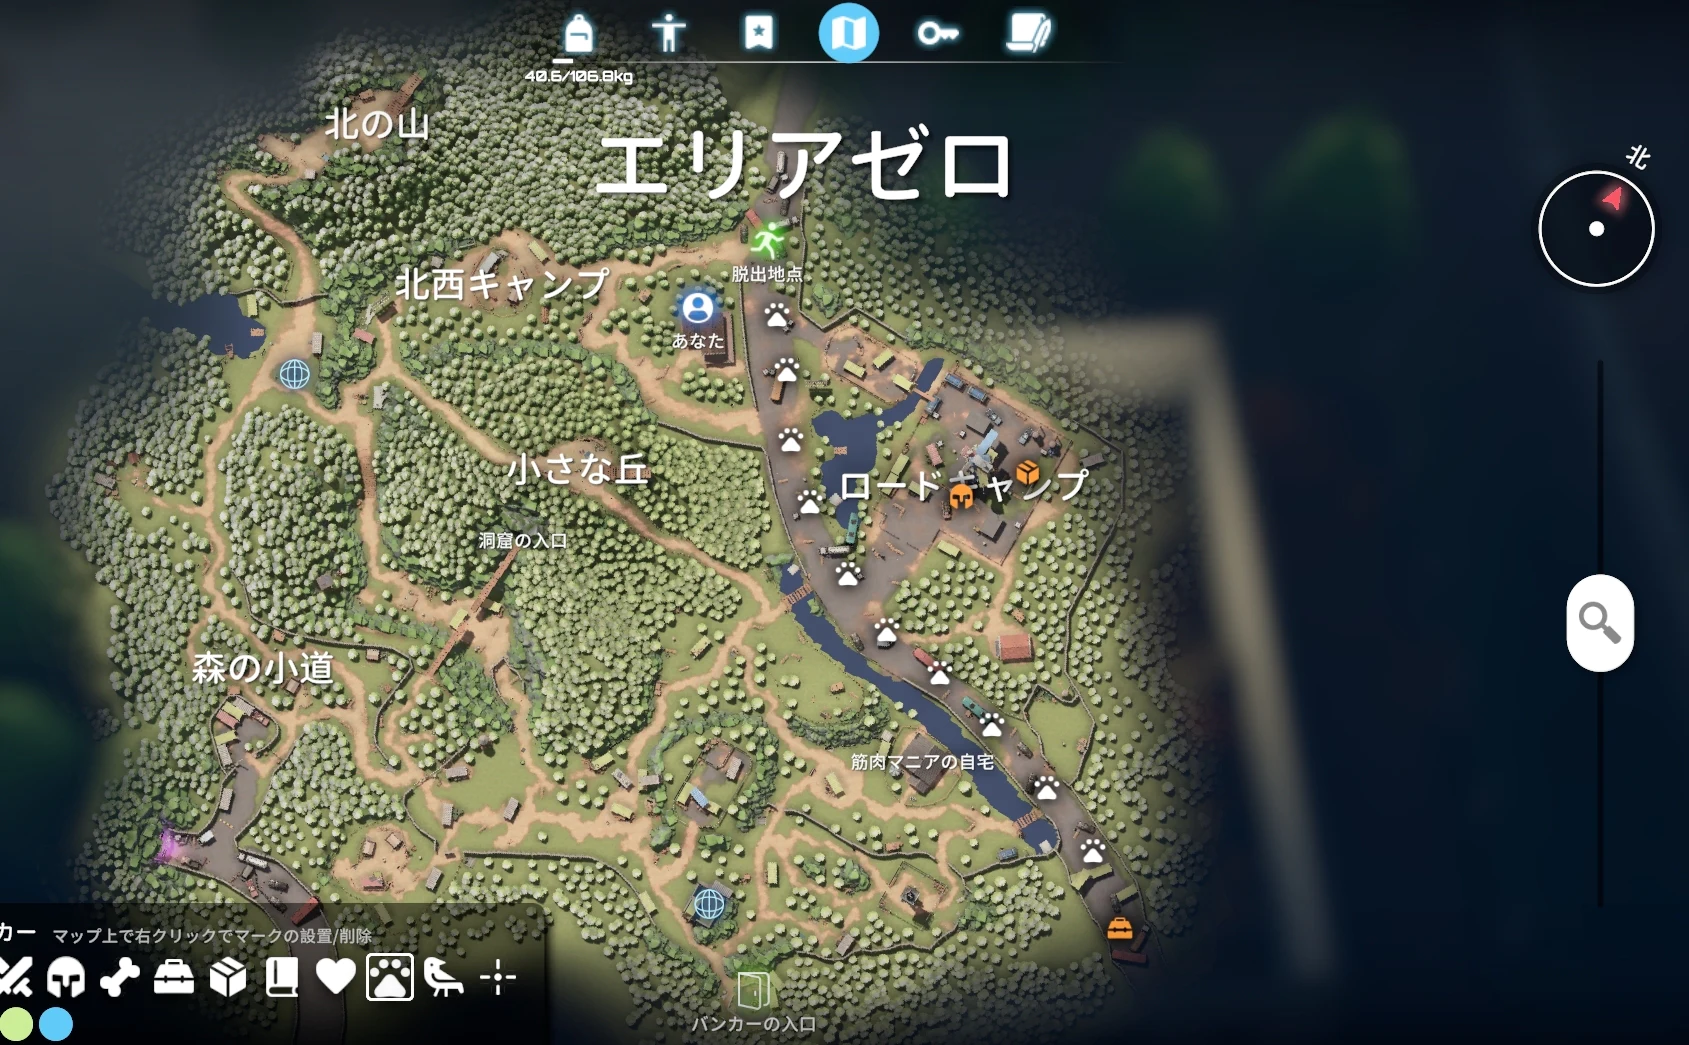
Route
- Start at the ladder in the bunker basement (orange hatch mark)
- Head north along the road
- Defeat the Chibi Gamo at the road camp
- Open the road camp safe with the “Safe Key” (orange box mark)
- Head north along the road
- Escape from the escape point
The route is here. The ladder in the bunker basement becomes usable once you reach that location in Area Zero and clear the obstructions on the ladder. If you don’t have the safe key, you can ignore the safe.
Incentive Items
- Safe key
Near the Little Duck, there is a safe that cannot be opened without a key. If you have the safe key, you can open it and obtain additional rewards. Safes tend to contain many sellable items, making them useful for earning money.
The safe key is a consumable item that can be used multiple times and cannot be registered.
How to Obtain the Safe Key
- Drops from items like “clothing”
Keys are often in clothing. Keep searching patiently.
J-Lab Key
Essential items
- J-Lab Access Level 1
- Level 5 or higher armor (guideline)
- Level 5 or higher weapons (guideline)
Progressing through the quests will grant you access to a facility called “J-Lab.” Here, you’ll find numerous items for sale, such as “graphics cards” and high-quality weapons and armor. On the downside, all enemies are at least Mercenary rank and are quite powerful. Therefore, you’ll want Tier 5 or higher weapons and armor. Level 5 weapons include the “AK103,” “DT MDR556,” and “M700.”
How to Obtain J-Lab Level 1 Access Credentials
- Explore Farm Town
- Farm Town’s Mysterious Merchant (Random Sales)
- Min’s Sales (After Quest Completion)
J-Lab Level 1 Access Pass can be found by exploring Farm Town or purchased randomly from the mysterious merchant in Farm Town. After completing the quest, you can purchase it from Min.

Mysterious Key Loop (XO Key)
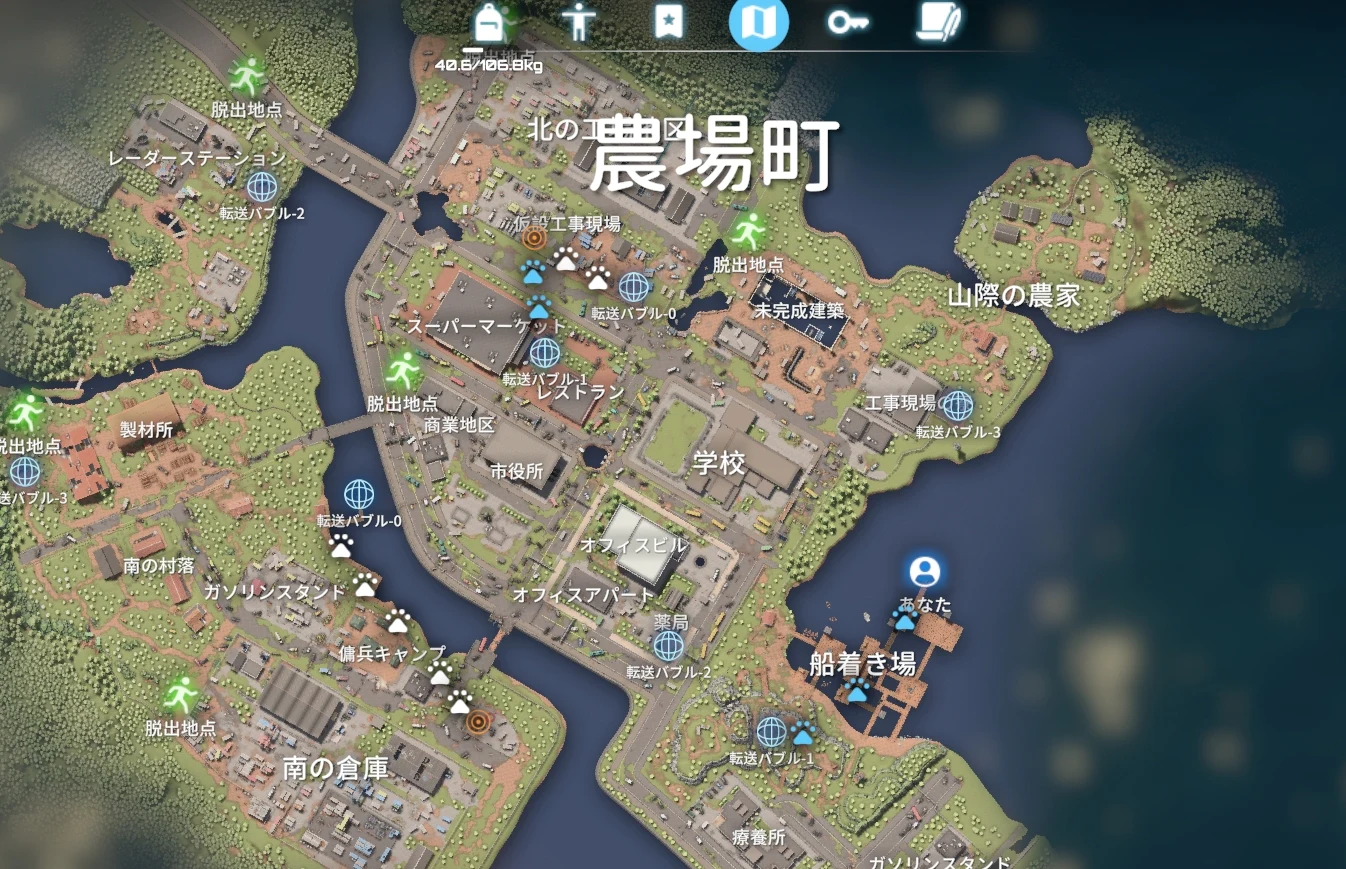
The blue footprints indicate an alternate route when using the ship ticket. The temporary construction site contains an “X-key room,” and east of the mercenary camp lies an “O-key room.”
Route
- (From the Bunker Basement to the Farm Town Dock by Boat)
- (From Bubble 1 to the Temporary Construction Site)
- To the X-Key Room at the “Temporary Construction Site”
- To “Temporary Construction Site East Bubble 0”
- From “Bubble 0” to the O-Key Room at “Mercenary Camp East”
Starting from the Banker’s Basement is recommended since it locks your route, but since it requires a ticket purchase, a random start is also acceptable.
Using “Bubble 0” allows travel between the X-key room and O-key room. If starting randomly, head to whichever is closer, then use “Bubble 0” to reach the other room.
Essential items
The “Mysterious Key X” and “Mysterious Key O” are sold by the mysterious merchant in Farm Town. They cost a hefty sum, so you’ll need to save up quite a bit to purchase them. They run into the hundreds of thousands of dollars. The O key is more expensive, but the rewards are also more luxurious.
While the initial cost is high, you’ll come out ahead if you bring back all the rewards for all 10 uses (the number of times each key can be used).
J-Lab Key Card
In the XO Room, you can obtain the key card for J-Lab’s special room. There are also powerful rewards there, so once you get it, head to J-Lab.
How to Obtain the Mysterious Key X and the Mysterious Key O
- The Mysterious Merchant of Farm Town
- Rare Drop
- black market
As mentioned earlier, the primary way to obtain the Mysterious Key is to purchase it from the Mysterious Merchant in Farm Town. On rare occasions, you may find it while exploring. Sometimes, the key itself is placed inside a room unlocked with the XO Key.
On rare occasions, it may appear on the black market. Since you can purchase it for about half price on the black market, be sure to buy it if you find it.